
Move-Out Checklist for Landlords: Inspect a Unit Fast
Move-Out Checklist for Landlords: How To Inspect, Document and Turn Over a Unit
Vacancy is expensive, and most delays happen during turnover. Every day the unit sits unprepared is a day you can’t show it or collect rent. But missed inspections, unclear expectations, and leftover junk can slow down repairs and cleaning.
A structured move-out process can prevent those delays. It gives you a clear record of the unit’s condition and a predictable workflow to get the unit ready for showings.
This guide walks you through a move-out checklist for landlords. We’ll show you the full process, from setting expectations to completing the inspection and handling the deposit. And when the unit requires a full clear-out, College HUNKS Hauling Junk & Moving can clear the unit fast.
Step 1: Communicate Move-Out Expectations to the Tenant Before They Leave
Clear communication reduces disputes and speeds up turnover. Use the following to avoid last-minute issues that slow down the next move-in.
Require Adequate Notice of Move-Out Date
Adequate notice is required by law. Tenants must give notice within the timeframe stated in the lease, provided it complies with state and local laws. Most leases require written notice delivered a set number of days before move-out, and many states impose minimum notice periods. Confirm your lease meets those requirements so you have enough time to plan repairs and prepare the unit before vacancy loss begins.
Send a Move-Out Notice With Clear Requirements
In a written, dated notice sent to the tenant, include the move-out date, the expected condition of the unit, and any tasks the tenant is required to complete. Include cleaning standards, such as empty cabinets, patched nail holes, and junk removal. Attach a moving-out checklist for tenants to follow, so they know what you’ll evaluate during the inspection.
Request a Forwarding Address
Before a tenant moves out, ensure you have a forwarding address. State laws require landlords to send the itemized deposit statement and any refund to the address the tenant provides.
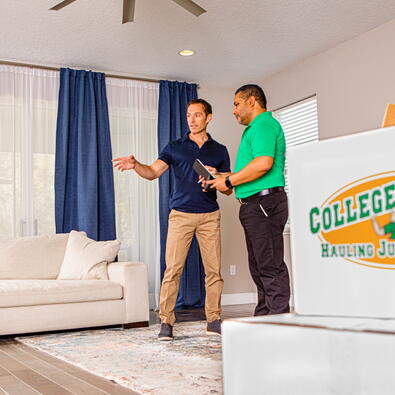
Step 2: Conduct the Move-Out Inspection Room by Room
A thorough inspection protects you from deposit disputes and claims of improper charges. Complete the inspection within 24 to 48 hours after the tenant returns possession of the unit.
Landlords need more than a checklist when a tenant moves out. They should also have the original move-in report to guide the current inspection. This document shows the unit’s original condition. Without it, proving whether damage occurred during the tenancy or existed beforehand becomes difficult.
Walk through every room with a move-out inspection checklist in hand. Photograph every surface, appliance, and fixture. This level of documentation gives you visual proof of both damage and normal wear. Here’s what to look for in each unit:
Walls and ceilings: Look for holes, scuff marks, and paint you didn’t approve. Check light fixtures for cracks or missing parts.
Floors and carpets: Check hardwood floors for gouges or water damage. Make sure carpets don’t have stains or pet damage.
Windows and doors: Open and close each window and door to confirm they work as expected. Note any cracks or torn screens.
Kitchen: Examine the countertops and cabinets for chips, baked-on grease, and missing hardware. Check appliances inside and out, including those hard-to-reach spots like behind the refrigerator and oven.
Bathrooms: Inspect for water damage around the sink, toilet, and tub. Look for signs of an active leak or moisture that’s spread into the subflooring.
You can charge for damage but not ordinary wear. Faded paint or a lightly worn carpet fall under the usual wear and tear, but pet stains or shattered tiles indicate damage that requires repair beyond routine upkeep. Before charging a tenant, confirm the issue exceeds normal wear and complies with your state’s rules.
Step 3: Handle the Security Deposit Correctly
Rules about security deposits vary by jurisdiction. Many states impose penalties when landlords fail to follow deposit requirements. Withholding deposits in bad faith can lead to fines or double to triple damages. The following tips can help protect you from penalties and disputes.
Know Your State’s Deadline
Check your state’s legislation regarding the timeline to settle up with tenants. You typically have 14 to 60 days to return the full deposit when no claim is made. If you plan to make deductions, many states require written notice within a set period.
Provide an Itemized List of Deductions
If you intend to keep all or a portion of the deposit, send an itemized list with each deduction and the reasoning. This may include unpaid rent or necessary repairs. Be as specific as possible. Keep the inspection photos, notes, invoices, and other supporting records in your property file.
Give the Tenant a Copy of the Condition Report
Along with the itemized list, include a move-out condition report. It details what you found and how you documented each issue. The goal is to create a paper trail that protects you should a tenant decide to dispute any deductions or pursue legal action.
Step 4: Turn the Unit Over Fast
Once the inspection is complete, it’s time to get the unit ready for a new tenant. Immediately after inspection, start repairs, re-key the locks, and thoroughly clean the unit.
If the tenant leaves belongings behind, don’t immediately discard them. Follow your state’s abandoned property rules, which may require written notice and waiting periods of seven to 90 days or longer for tenants to reclaim their items.
Once the apartment is clean and secure and you’ve found a new tenant, walk them through and fill out a move-in report. This record protects both sides during the next tenancy.
Speed Up Turnover With Professional Junk Removal
With just a few steps outlined here, you can set a tenant’s expectations, inspect the space quickly, and start showing new renters around. A move-out rental checklist is an essential first step, but turnover often stalls when a tenant leaves behind bulky items or a full apartment of abandoned belongings. These delays slow repairs and extend vacancy loss.
College HUNKS handles more than moving. We specialize in clearing units so landlords can begin turnover immediately. Our trained professionals remove unwanted furniture and appliances. We also haul items to approved facilities so you stay compliant with local waste rules.
You don’t have to handle every part of a turnover yourself. When you’re ready, give College HUNKS a call for a free, no-obligation quote.